TotalFootballFan9
Member
- Joined
- Dec 10, 2013
- Messages
- 4,113
- Reaction score
- 201
- Points
- 63
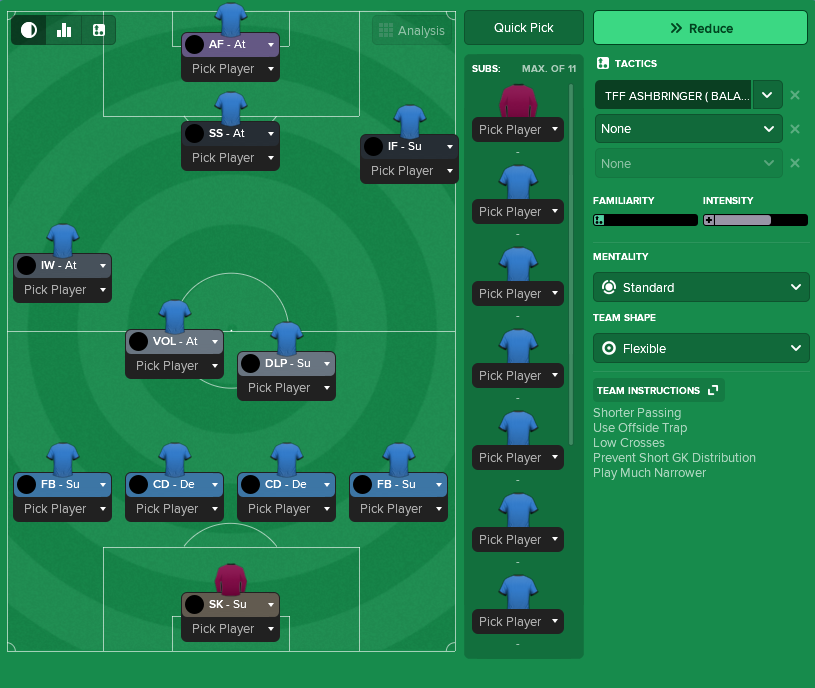
BALANCED VERSION
DOWNLOAD THE TACTIC---> TFF ASHBRINGER ( BALANCED ) V3
DOWNLOAD A MIRROR VERSION---> TFF ASHBRINGER ( BALANCED ) -MIRROR- V3
The mirror version has IF on the left and IW on the right, everything else is the same
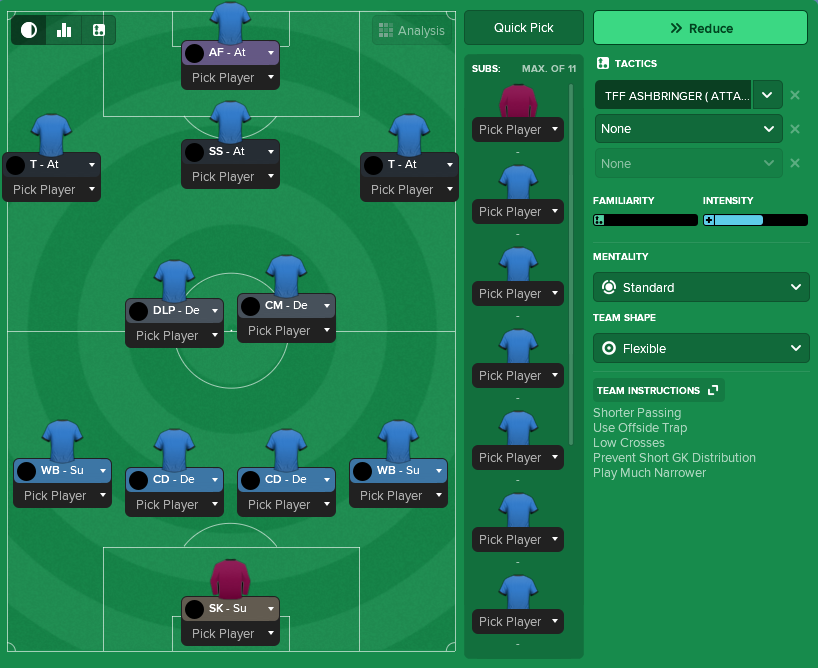
PLAYERS INSTRUCTIONS
( FOR THOSE WHO PLAY ON A TABLET )
CLICK TO INCREASE THE SIZE
View attachment 46298
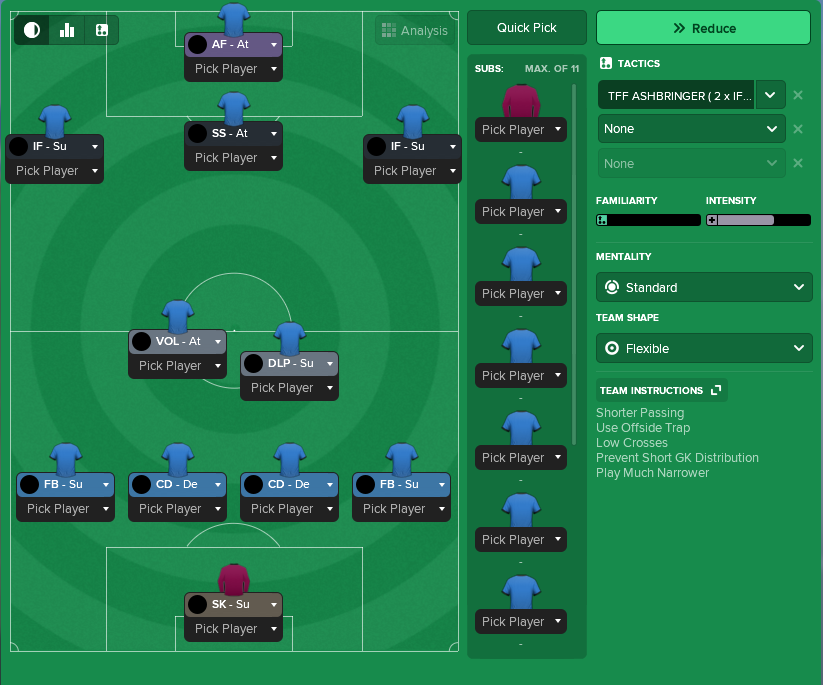
2 X INSIDE FORWARDS VERSION
DOWNLOAD THE TACTIC---> TFF ASHBRINGER ( 2 x IFs version ) V3
Please notice, that this version is less efficient than the main version with IW + IF and also, it's even less efficient than 2 x IWs version ( Stormcaller ) so I suggest using it until you get IWs or train your IFs to play IWs
WASTE TIME TACTIC
DOWNLOAD THE WASTE TIME TACTIC ---> WASTE TIME TACTIC ( ASHBRINGER )
Use this tactic when you need to protect your lead and "kill" the game. Please notice that this tactic doesn't give 100% guaranty that you don't concede it only greatly reduces the probability of it so if you start using this tactic too early, for example, when you've got a shaky lead by 1 goal then it might backfire and you might concede a fluke goal at the last minute and give away a win so you should use this tactic it wisely.
INTRODUCTION:
Hi guys,
I was receiving many requests to share a good tactic that have 4-2-3-1 formation so after some consideration I decided to do share it.
Please notice, this tactic is less efficient than Demolisher V7 but I find that it offers such overachieving level that many find acceptable and fun to play, especially, if they like to play with classic 4-2-3-1 formation.
Down below you can see how ASHBRINGER V1 stands against DEMOLISHER V7 :
DEMOLISHER V7
Matches Played = 190
Points = 440
Goal Difference = +301
Scored = 545
Conceded = 244
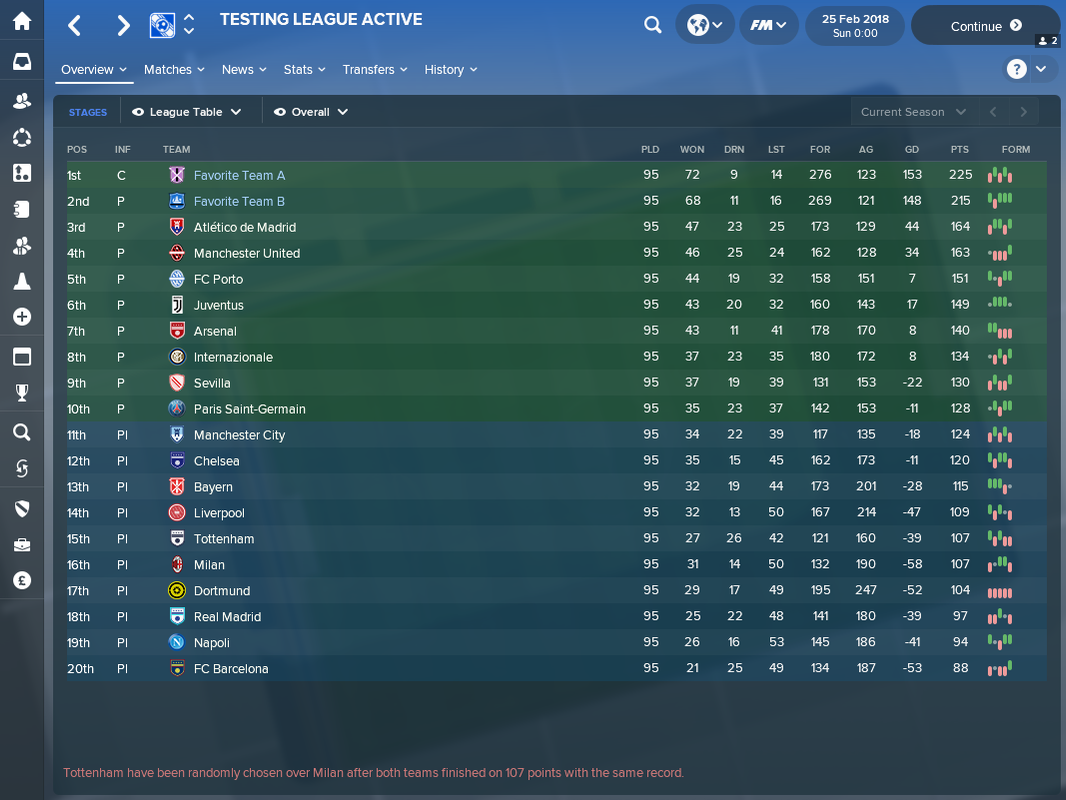
ASHBRINGER ( BALANCED ) V3
Matches Played = 190
Points = 383
Goal Difference = +195
Scored = 415
Conceded = 220
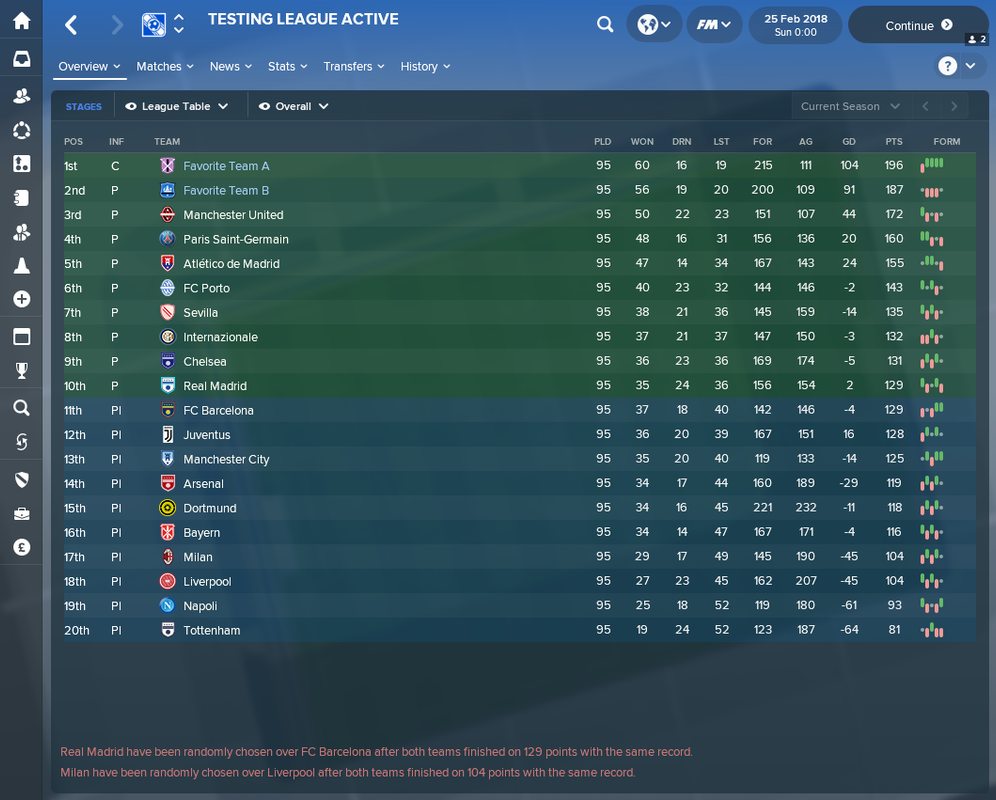
PLAYERS' STATS AFTER 95 MATCHES PLAYED

IMPORTANT INFORMATION:
-- AML : Right Foot - Very Strong/Strong/Fairly Strong
-- AMR : Left Foot - Very Strong/Strong/Fairly Strong
-- MCR : Right Foot - Very Strong/Strong
-- MCL : Left Foot - Resonable/Fairly Strong/Strong/Very Strong
-- DCR : Right Foot - Very Strong
-- DCL : Left Foot – Very Strong/Strong/Fairly Strong
-- AML/AMC/AMR positions should take the corners
-- if you got a player sent off then remove AMC
YELLOW AND RED CARDS
Please notice that all positions in the tactic have “Tackle Harder” PI which means that you need to control your players’ tackling aggression during matches in order to avoid getting a man sent off so if during a match you see that someone of your players gets booked then go to the tactic menu and add "Easy Off Tackles" PI to this players or otherwise there’s a high risk that this player gets a second yellow card/red card.
OPPOSITION INSTRUCTIONS:
DON'T USE ANY OIS AND DON'T LET YOUR ASSISTANT MANAGER TO SET ANY OIS FOR YOU
TRANING AND MATCH PREPARATION:
1)Put the tactic into all 3 tactic slots because it makes the tactic familiarity grows much faster.
2) During the pre-season set MATCH PREPARATION(Main Focus) - "Match Tactics" set the training as it's shown at the screenshot below.

3) During the pre-season play no less than 6-7 friendly matches, I recommend arranging friendly matches vs much weaker opponents in order to get guaranty easy wins and have "Superb" morale for the begging of the season.
4) When the tactic familiarity reaches about 90% then change MATCH PREPARATION(Main Focus) to "Att. Movement" and set the training as it's shown at the screenshot below.

Individual Training Focus:
STC : Individual Training Focus = "Trequartista"
AML/AMR : Individual Training Focus = "Inside Forward"
AMC : Individual Training Focus = "Trequartista"
MCL/MCR : Individual Training Focus = "Deep Lying Playmaker";
CDL/CDR : Individual Training Focus = "Ball Playing Defender" Training Focus
DL/DR : Individual Training Focus = "Complete Wing Back";
GK : Individual Training Focus = "Goalkeeper"
Last edited:
")